How to Set Laser Marking Parameters? – 5 Key Parameters Setting You Must Know.
When doing your laser marking project, have you encountered various problems such as graphics not being closed, “match heads” appearing, scattered points appearing, etc.? Do you have some doubts about the laser marking parameters setting? This article will tell you how to set 5 key laser marking parameters.
Tested using Sino-Galvo SG7220 galvanometer and JHC laser marking software. The above parameters are used for reference only. You should adjust the parameters according to your galvanometer, workpiece, graphics, etc.
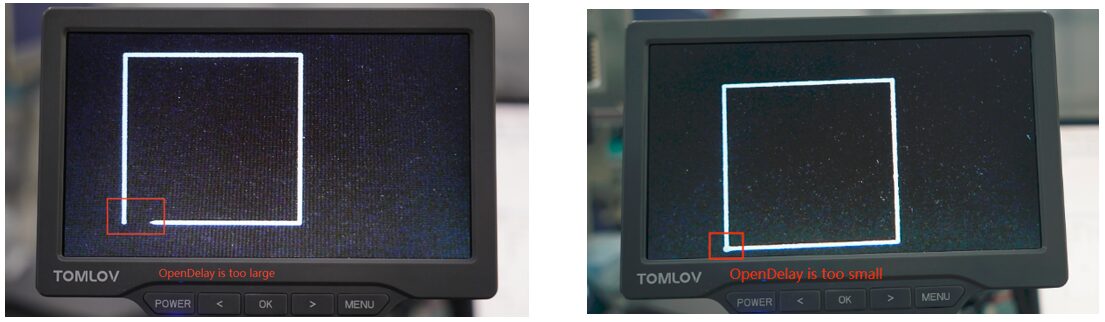
Laser Marking Parameter : Open Delay
The delay time of laser on at the beginning of marking. It can be a negative value. If the delay time is too small, the “match head” phenomenon will appear. If the delay time is too large, the starting section will be missing.
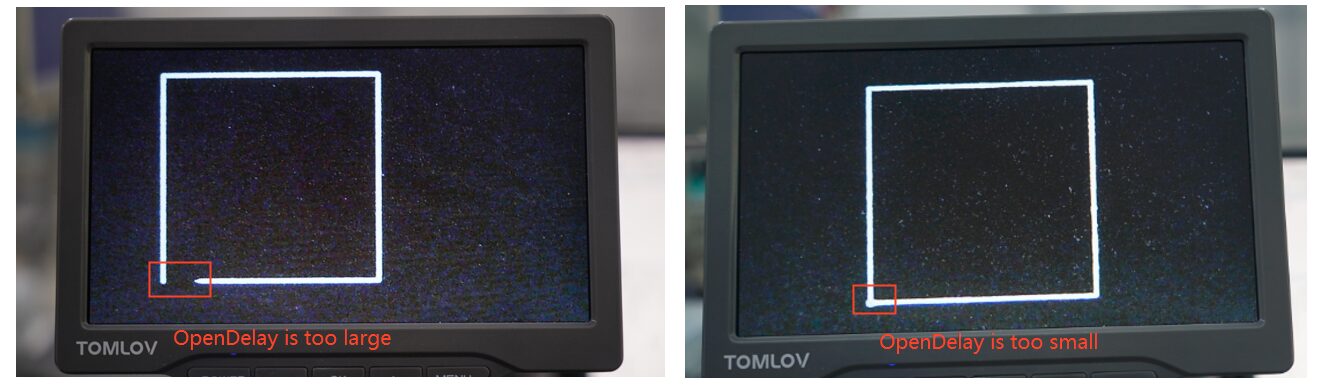
Note:
- The laser marking of the square is done in a counterclockwise direction.
- Magnifier: about 70 times.
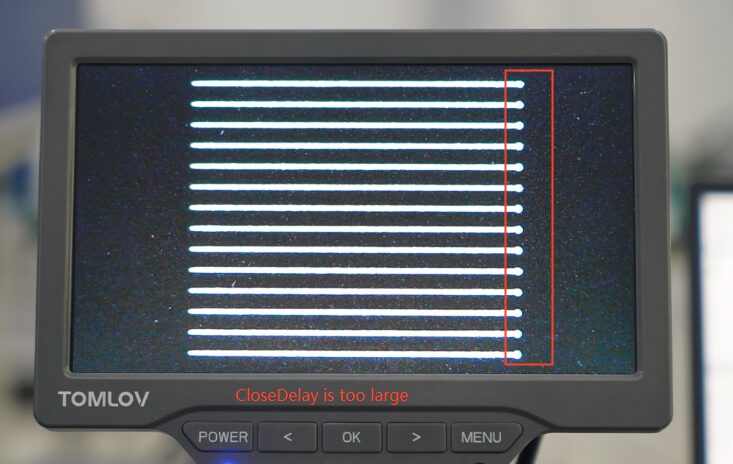
Laser Marking Parameter : Close Delay
The delay time of laser shut-off at the end of marking. It cannot be a negative value. Setting an appropriate laser shut-off delay parameter (reference value: 100 us) can eliminate the phenomenon of not closing at the end of marking, but if the laser shut-off delay is set too large, it will cause the “match head” phenomenon at the end segment.
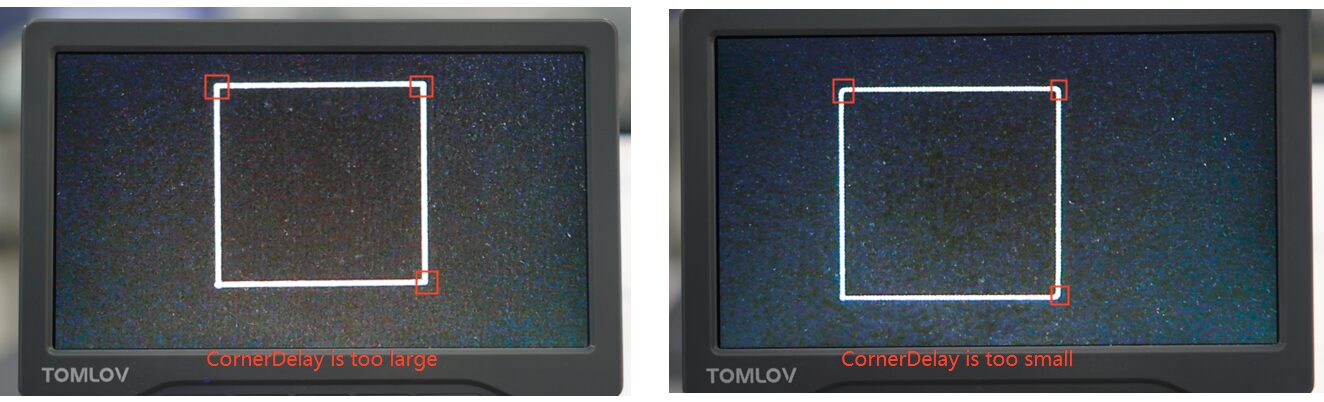
Laser Marking Parameter : Corner Delay
The delay time between each section during marking. When one stroke sends out an end command, the next stroke sends out a start command, and there is no empty stroke in between. At this time, due to the hysteresis of the galvanometer, it will take some time for the galvanometer to reach the specified position. If the parameter is too large, the galvanometer has fully rotated, but the laser has not stopped emitting light, and a “match head” will appear at the corner; if the parameter is too small, the galvanometer has not fully rotated, and it starts marking the next section, and an arc will appear at the corner.
 Click to enlarge pictures
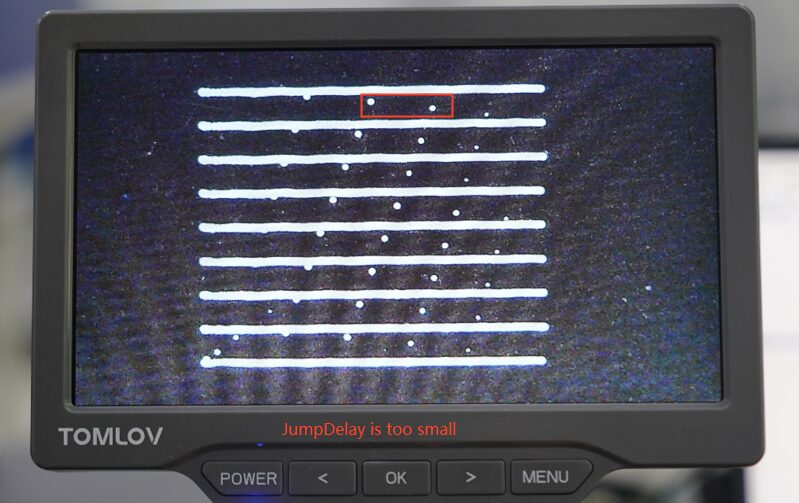
Laser Marking Parameter : Jump Delay
The time to wait for the galvanometer to reach the specified position. When the last instruction of an empty stroke is given, due to the hysteresis of the galvanometer, it will take some time to reach the specified position, so this parameter should be set to wait for the galvanometer to reach the specified position. If the parameter is too large, the galvanometer has already fully rotated and stays for a while before processing the next stroke, which increases the marking time; if the parameter is set too small, the laser has already emitted light before the galvanometer has fully rotated, and scattered points will appear at the beginning of the stroke.
Laser Marking Parameter : Over Delay
The time to wait for the laser to be completely turned off. It cannot be a negative value. The laser needs a period of response time from the time the light-off command is issued to the time the laser is completely turned off. Setting an appropriate end delay parameter (reference value: 100us) is to give the laser sufficient light-off response time to achieve the purpose of completely turning off the laser before the next marking. An appropriate end delay parameter can eliminate the “tailing” phenomenon that occurs during marking. However, if the end delay is too large, it will affect the processing speed.

If you have any questions, please contact us and our technicians will discuss with you.